Within the span of one week, I find it interesting that I’ve had a couple of people asking me how to install CodeIgniter (which I affectionately call CI) on a local development environment. I personally have it set up both on my production server at DigitalOcean, as well as on my laptop.
Are you like me and them and want to develop and test your CodeIgniter projects before deploying them live? Setting up a local development environment allows me to work on my projects offline and iterate quickly. I’ve had my Windows laptop set up with XAMPP and CodeIgniter years ago, so things are a bit hazy.
Now I’ve decided to document them properly, and here’s my guide to walk you through how to run CodeIgniter projects in Windows localhost using XAMPP. For this guide, I use XAMPP 8.1.25, Composer 2.7.9, and CodeIgniter 4.

Table of Content
A) Preparing Your Environment
Step 1: Install XAMPP
Step 2: Install Composer
Step 3: Run Composer Installer
Step 4: Verify Composer Installation
B) Setting Up Your CodeIgniter Project
Step 6: Create a New CodeIgniter Project
Step 7: Enable PHP Intl Extension
Step 8: Install CodeIgniter via Composer
C) Configuring Your Virtual Host
Step 9: Configure Apache to Listen on Multiple Ports
Step 10: Create a Virtual Host Configuration
A) Preparing Your Environment
Step 1: Install XAMPP
The first step involves installing XAMPP, a popular open-source web server package that bundles Apache, MySQL, PHP, and other components needed to run CodeIgniter projects in localhost. Make sure to pay close attention during installation and choose a directory path without any spaces in the folder names. Spaces in the path can create issues later on. It doesn’t matter if you use the portable version, either, as long as you install Apache, PHP, and MySQL / MariaDB.
In my case, I just go with the default C:\xampp.
Step 2: Install Composer
Composer is a dependency manager for PHP that simplifies the installation of libraries and frameworks. It’s different from nodeJS simply because nodeJS manages JavaScript packages, and Composer manages PHP ones. In terms of purpose, though, it kind of does the same thing.
Download the Composer installer (Composer-Setup.exe) and place it in the root directory of your XAMPP installation. In my case, I downloaded the installer and I should see it at C:\xampp\Composer-Setup.exe.
You can set up CodeIgniter and NOT use Composer, LOL! That’s how I started. Over the years, I didn’t want to worry myself with its dependencies and updates, so I recommend the following Composer steps if you want to get serious with CI.
Step 3: Run Composer Installer
Navigate to the XAMPP root directory in Windows Explorer and double-click the Composer installer to initiate the installation process.
Step 4: Verify Composer Installation
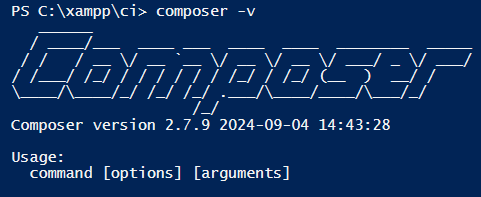
Once the installation is complete, open a Powershell window. In the command line, type composer -v. If Composer is installed correctly, this command should display the installed version.

Step 5: Run Composer Diagnostics
To ensure Composer is configured correctly with your PHP environment, run the composer diagnose command. This will run a series of checks and provide you with a report highlighting any potential issues, mostly to make sure Composer can run smoothly.
B) Setting Up Your CodeIgniter Project
As mentioned, you can also manually install CI without a Composer command. If you’re going for the manual route, you’ll want to come back to this guide afterwards and continue with C) Configuring Your Virtual Host. You’ll also need to enable PHP’s php_intl.dll extension as instructed in Step 7.
Otherwise, continue on.
Step 6: Create a New CodeIgniter Project Folder
Within your XAMPP directory (but not the htdocs web root directory), create a new folder for all your CodeIgniter project. You can name it anything you like.
For simplicity, let’s use my example and name that folder as ci (e.g., c:\xampp\ci).
Step 7: Enable PHP Intl Extension
The CodeIgniter framework utilizes the PHP Intl extension for internationalization features. If you create a project without the php_intl.dll and php_mbstring.dll extensions enabled, you’ll encounter the following error when creating a CI project:
Your requirements could not be resolved to an installable set of packages.
Problem 1
- codeigniter4/framework[4.0.0, …, v4.5.5] require ext-intl * -> it is missing from your system. Install or enable PHP's intl extension.
- Root composer.json requires codeigniter4/framework ^4.0 -> satisfiable by codeigniter4/framework[4.0.0, …, v4.5.5].
To enable php_intl.dll, locate the php.ini file within your XAMPP installation (usually c:/xampp/php/php.ini).
Open the file with a text editor and find the line containing ;extension=php_intl.dll. Remove the semicolon in front of this line to enable the extension. Save the php.ini file after making the changes.
Step 8: Install CodeIgniter via Composer
Navigate to your newly created project folder (e.g., c:\xampp\ci) using Powershell. Within the Powershell window, execute the command composer create-project codeigniter4/appstarter myappname to install CodeIgniter using Composer.
cd c:\xampp\ci
composer create-project codeigniter4/appstarter myappname
Replace myappname with your desired project name. This command will download and install the CodeIgniter framework and its core dependencies, and also create a new folder with said project name. In our case, running the command in the example above will create c:\xampp\ci\myappname\ and a bunch of directories under it.
C) Configuring Your Virtual Host
Okay, disclaimer slash rambling time (or skip this to the actual next steps).
I actually just change the web root of XAMPP from c:\xampp\htdocs to wherever my CI project’s public folder is at. Since CI is a framework, it comes with loads of other libraries and directories to make web app development faster. The only actual thing you’d want visitors to see is whatever’s under its public folder. Therefore, if I install CI under htdocs, then I’m exposing the other CI folders that aren’t suppose to be public, thus creating security issues for the app.
I need to explain this as it’s a common question I often get amongst self-taught PHP developers who’ve never used PHP frameworks before. Myself included, once upon a time. This is why all the steps under B) Setting Up Your CodeIgniter Project give you examples where CI is stored outside of htdocs.
The conundrum is that by changing XAMPP’s web root, I don’t have access to my non-CodeIgniter projects anymore in htdocs.
So how do I separate access on http://localhost for both my htdocs and CI projects?
There are a few ways around this if you want to keep XAMPP web root as well as CodeIgniter accesses. Even though I use VirtualDirectory and subdomains for my CI projects in my production server, I’ve had no luck setting this on local XAMPP; it keeps redirecting to the the default XAMPP dashboard.
For my guide, I’m going towards the route of using different HTTP ports to separate XAMPP htdocs (port 80) and my CodeIgniter public project folder (port 88). By following the steps, you’ll be able to access htdocs using http://localhost, and CI projects using http://localhost:88. I’ll update this guide once I figure out how to resolve my local dev env subdomain issue.
Step 9: Configure Apache to Listen on Multiple Ports
Shut down Apache and quit XAMPP if you haven’t done so.
Open the httpd.conf file located in your XAMPP installation (usually c:\xampp\apache\conf\httpd.conf). Find the Listen 80 directive and add a new Listen directive for port 88:Listen 80Listen 88
This will allow Apache to listen on both ports 80 and 88.
Can you use a different port number than 88? Yes, you can, as long as the port isn’t used by any other service.
Step 10: Create a Virtual Host Configuration
By default, XAMPP serves websites located within the htdocs directory. To instruct XAMPP to serve your CodeIgniter project from a different location or port, we need to create a virtual host configuration.
Open the httpd-vhosts.cnf file situated at C:\xampp\apache\conf\extra\httpd-vhosts.cnf with a text editor. Add the following code snippet, replacing C:\xampp\ci\myappname\public with the actual path to your CodeIgniter project’s public directory:
<VirtualHost *:88>
    DocumentRoot "C:/xampp/ci/myappname/public"
    <Directory "C:/xampp/ci/myappname/public">
        AllowOverride All
        Require all granted
    </Directory>
</VirtualHost>
Notice the forward slash in the directory path of the VirtualHost code? It’s perfectly fine. I base it on the example given within the httpd-vhosts.cnf file itself.
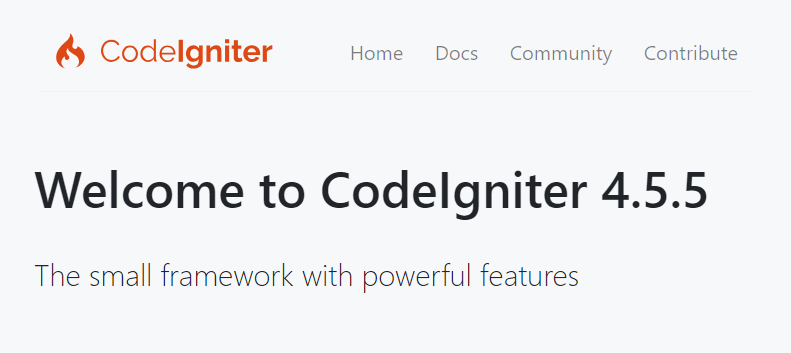
You should be good to go. Run XAMPP and start Apache. Last but not least, navigate to http://localhost:80 for the XAMPP webroot, and http://localhost:88 for your CodeIgniter project!

What other question do you have about CodeIgniter? Let me know in the comments, or feel free to reach out to me.
Check out my other posts: « Website audit: Blog cleanup & changing stuff around /