(Updated on 7/9/2012)
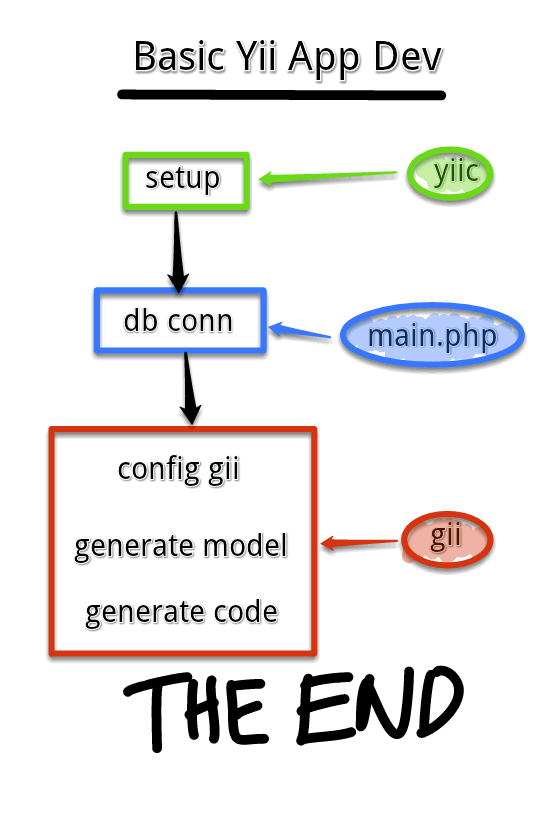
Install Yii
- Download Yii.
- Unpack Yii into server.
Note: Yii doesn’t need to be installed in htdocs.
Set up a new application/project
- Open the command line editor.
- Change the directory to %<Yii root dir>/framework.
- Type the following (<WebRoot> = main web folder, <appfolder> = folder where you’ll keep your apps: webapp <WebRoot>/<appfolder>
- Open your browser and go to http://<hostname>/<appfolder> to test the app.
Note: Does NOT work on a mapped drive on Windows, due to the hard-mapped location of XAMPP in the yiic.bat file.
Configure database (for MySQL setup)
- Create database in MySQL.
- Open <appfolder>/protected/config/main.php in text editor and edit “db” string.
- Also uncomment the MySQL connection, and comment out the SQLite connection in the main.php file.
- Create tables in database using MySQL.
Configure gii
- Open <appfolder>/protected/config/main.php and edit “gii” string (pun intended).
- Browse http://<hostname>/<appfolder>/index.php?r=gii and enter password (gii string).
Generate model
- Click Model Generator link.
- Enter datatable and model info.
- Press Preview and Generate buttons.
- Take note of the Model name, and make sure to follow the uppercase letters if any.
Generate codes
- Browse http://<hostname>/<appfolder>/index.php?r=gii
- Enter model (same as the one you noted in the Generate Model steps) and controller ID info.
- Press Preview and Generate buttons.
Access pages
Browse http://<hostname>/<appfolder>/index.php?r=<model> and test CRUD operations.
(end of quick start)
Once you are ready to customize the app, I advise you to go through the Yii Blog System tutorial to get a feel of how the codings are modified.
Spread the love
Check out my other posts: « Creative writing workshop with Robert Raymer / Must-have free app for my Android tablet: Graffiti »