
Here’s a straightforward way to duplicate a Flutter project folder into a new project. This has been tested using Android Studio 4.1.3 on Windows 10.
- Open into Android Studio the existing Android app project you would like to duplicate. Let’s call this project folder
old_flutter_project. - While the project is still open, find and copy the project folder location in your drive. Let’s assume I save this project folder as
D:\Lorna\flutter\projects\old_flutter_project, so I right-click on theold_flutter_projectfolder and select Copy. - Paste the folder into the location you choose. I recommend that you save in the same location along with your other Flutter project folder so that you can easily find and do backup. In my instance, once pasted, I now have the following folders:-
D:\Lorna\flutter\projects\old_flutter_projectD:\Lorna\flutter\projects\old_flutter_project - Copy
- Rename the new folder you pasted. I recommend that you rename it in the same way you want to call your project. For this example, once I renamed it to
new_flutter_project, my folder content looks like this:-D:\Lorna\flutter\projects\old_flutter_projectD:\Lorna\flutter\projects\new_flutter_project
- Go into the new folder and delete the
.ideafolder. In my example, my new folder contains the following:-D:\Lorna\flutter\projects\new_flutter_project\.ideaD:\Lorna\flutter\projects\new_flutter_project\old_flutter_project
So I deleted the.ideafolder, leaving justold_flutter_projectfolder inside.
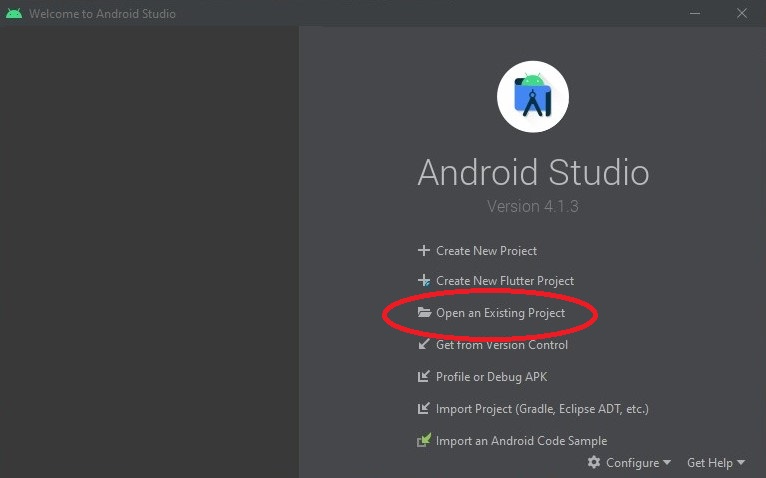
- Open the new project folder in Android Studio. At this time, you may also close the old Flutter project from Android Studio. I recommend that you use the
Open an Existing Projectoption from the Android Studio startup wizard, although opening it viaFile>Openshould be fine, too.
- Once your new project is loaded and analyzed, you will get a Framework Detected notice. Select
Configureand clickOK.

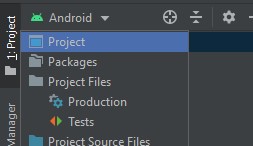
- At this point, Android Studio shows the whole Android framework of your new project folder. In the Project view, click the dropdown arrow and select
Project. This will display your new project root folder.
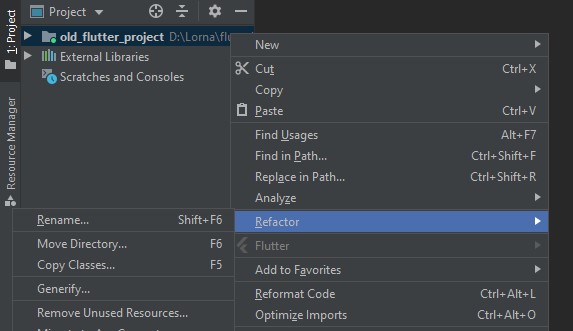
- Right-click on the project folder root and select Refactor > Refactor This… > Rename… .
- Type in your new project name and click OK. I recommend that your folder and project names match so that you can easily identify them later. For my example, I type
new_flutter_project. - Select
File>Save All.
–END
Will this work with all other non-Flutter projects on Android Studio? I’m not sure, as I haven’t tried. Nevertheless, the steps I describe above is similar to a Stack Overflow’s answer about copying an Eclipse project in Android Studio.
I hope this technique helps you. Happy Fluttering!
Spread the love
Check out my other posts: « Thoughts going into 2021 / Two easy and free handwriting-to-text apps for Android »